虚拟主机 CentOS 设置指南
在 CentOS 系统上设置虚拟主机(Virtual Host)是一项常见的任务,尤其是在需要在同一台服务器上托管多个网站的情况下,本文将详细介绍如何在 CentOS 7 和 CentOS 8 上设置 Apache 虚拟主机,包括创建目录结构、授予权限、创建虚拟主机文件等步骤。
准备工作
确保你有一个具有 sudo 权限的非 root 用户的 CentOS 服务器,并且已经安装了 Apache,如果尚未安装 Apache,可以使用以下命令进行安装:
sudo yum y install httpd  # 对于 CentOS 7
sudo dnf y install httpd  # 对于 CentOS 8
启用并启动 Apache 服务:
sudo systemctl enable httpd.service
sudo systemctl start httpd.service
创建目录结构
为每个虚拟主机创建一个目录来保存站点数据:
sudo mkdir p /var/www/example.com/public_html
sudo mkdir p /var/www/example2.com/public_html
为这些目录授予适当的权限,以便普通用户可以修改内容:
sudo chown R $USER:$USER /var/www/example.com/public_html
sudo chown R $USER:$USER /var/www/example2.com/public_html
确保 Web 目录及其内部的所有文件和文件夹具有读取访问权限:
sudo chmod R 755 /var/www
为每个虚拟主机创建 Demo 页面
在每个虚拟主机的public_html 目录下创建一个index.html 文件:
nano /var/www/example.com/public_html/index.html
添加以下 HTML 内容:
<!DOCTYPE html>
<html>
<head>
    <title>Welcome to Example.com!</title>
</head>
<body>
    <h1>Success! The example.com virtual host is working!</h1>
</body>
</html>
复制该文件到另一个虚拟主机:
cp /var/www/example.com/public_html/index.html /var/www/example2.com/public_html/index.html
编辑新文件以反映其域名:
nano /var/www/example2.com/public_html/index.html
为Welcome to Example2.com!。
创建新的虚拟主机文件
创建存储虚拟主机配置的目录:
sudo mkdir /etc/httpd/sitesavailable
sudo mkdir /etc/httpd/sitesenabled
编辑 Apache 主配置文件以包含这些目录中的配置文件:
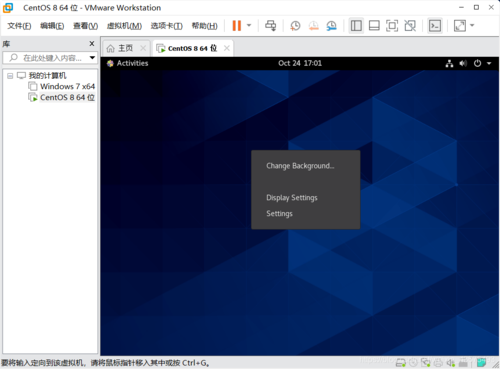
sudo nano /etc/httpd/conf/httpd.conf
添加以下行到文件末尾:
IncludeOptional sitesenabled/*.conf
配置虚拟主机文件
为每个虚拟主机创建一个配置文件:
sudo nano /etc/httpd/sitesavailable/example.com.conf
添加以下内容:
<VirtualHost *:80>
    ServerName example.com
    ServerAlias www.example.com
    ServerAdmin webmaster@example.com
    DocumentRoot /var/www/example.com/public_html
    <Directory /var/www/example.com/public_html>
        Options Indexes FollowSymLinks
        AllowOverride All
        Require all granted
    </Directory>
    ErrorLog ${APACHE_LOG_DIR}/example.comerror.log
    CustomLog ${APACHE_LOG_DIR}/example.comaccess.log combined
</VirtualHost>
保存并关闭文件,然后为第二个虚拟主机重复上述步骤:
sudo nano /etc/httpd/sitesavailable/example2.com.conf
启用虚拟主机配置
为每个虚拟主机创建符号链接:
sudo ln s /etc/httpd/sitesavailable/example.com.conf /etc/httpd/sitesenabled/example.com.conf
sudo ln s /etc/httpd/sitesavailable/example2.com.conf /etc/httpd/sitesenabled/example2.com.conf
测试配置文件语法:
sudo apachectl configtest
如果没有错误,重新启动 Apache 服务:
sudo systemctl restart httpd
FAQs(常见问题解答)
1. 如何在 CentOS 上更改默认的 SSH 端口?
答:要更改默认的 SSH 端口(例如从 22 改为 2222),请编辑sshd_config 文件:
sudo vi /etc/ssh/sshd_config
找到Port 一行并将其值更改为所需的端口号,
Port 2222
保存并退出编辑器,然后重新启动 SSH 服务:
sudo systemctl restart sshd
确保防火墙允许新的端口连接:
sudo firewallcmd permanent addport=2222/tcp
sudo firewallcmd reload
2. 如何在 CentOS 中查看已安装的软件包列表?
答:要查看已安装的软件包列表,可以使用以下命令之一:
rpm qa  # 列出所有已安装的软件包(适用于 RPM 包管理器)
yum list installed  # 列出所有已安装的软件包(适用于 CentOS 7 及更早版本)
dnf list installed  # 列出所有已安装的软件包(适用于 CentOS 8 及更高版本)
这些命令会显示系统中当前已安装的所有软件包及其版本信息。


