在CentOS 7上编译和安装HHVM(HipHop Virtual Machine)是一个相对复杂的过程,需要多个步骤和大量的依赖项,以下是一个详细的指南,帮助您完成这一任务。
系统准备
确保您的系统已经安装了CentOS 7,并且您有root权限,如果您使用的是较新的系统版本,建议先更新您的系统软件包:

sudo yum update y
配置EPEL仓库
EPEL(Extra Packages for Enterprise Linux)仓库提供了许多额外的软件包,这些软件包在默认的CentOS仓库中不可用,您需要安装EPEL仓库:
sudo yum install epelrelease y
安装必要的开发工具和库
HHVM的编译需要大量的开发工具和第三方库,以下是一些关键的依赖项:
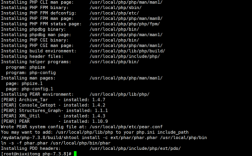
sudo yum install cpp gccc++ cmake git psmisc \
binutilsdevel boostdevel jemallocdevel \
libmemcacheddevel libeventdevel libxsltdevel \
libicudevel tbbdevel libzipdevel bzip2devel \
openldapdevel readlinedevel elfutilslibelfdevel \
libdwarfdevel libcapdevel libyamldevel \
libeditdevel unixODBCdevel ImageMagickdevel y
四、安装Google Glog和Oniguruma
这两个库在EPEL仓库中不可用,因此需要手动编译和安装。
1. 安装Google Glog
wget https://googleglog.googlecode.com/files/glog0.3.3.tar.gz
tar xvzf glog0.3.3.tar.gz
cd glog0.3.3
./configure
make
sudo make install
2. 安装Oniguruma

wget http://www.geocities.jp/kosako3/oniguruma/archive/onig5.9.5.tar.gz
tar xvzf onig5.9.5.tar.gz
cd onig5.9.5
./configure
make
sudo make install
下载和编译HHVM
您可以从GitHub克隆HHVM的源代码并开始编译:
cd /tmp
git clone https://github.com/facebook/hhvm.git hhvm
cd hhvm
git checkout hhvm3.4.1 # or any other version you want to compile
./configure
make j$(($(nproc) + 1)) # Use all available CPU cores for compilation
sudo make install
配置HHVM作为Systemd服务
为了方便管理HHVM,您可以将其配置为systemd服务。
1. 创建HHVM服务文件
sudo vi /usr/lib/systemd/system/hhvm.service
在该文件中添加以下内容:
[Unit]
Description=HHVM HipHop Virtual Machine (FCGI)
After=network.target nginx.service mariadb.service
[Service]
ExecStart=/usr/local/bin/hhvm config /etc/hhvm/server.ini user nginx mode daemon vServer.Type=fastcgi vServer.FileSocket=/var/run/hhvm/hhvm.sock
[Install]
WantedBy=multiuser.target
2. 创建必要的目录和配置文件
sudo mkdir p /etc/hhvm
sudo chown nginx:nginx /var/run/hhvm
sudo chown nginx:nginx /var/log/hhvm
在/etc/hhvm目录下创建server.ini和php.ini文件,并根据需要进行配置,编辑server.ini:

ResourceLimit {
    CoreFileSize = 0 # in bytes
    MaxSocket = 10000 # must not be 0, otherwise HHVM will not start
    SocketDefaultTimeout = 5 # in seconds
    MaxRSS = 0
    MaxRSSPollingCycle = 0 # in seconds, how often to check max memory
    DropCacheCycle = 0 # in seconds, how often to drop disk cache
}
Log {
    Level = Info
    AlwaysLogUnhandledExceptions = true
    RuntimeErrorReportingLevel = 8191
    UseLogFile = true
    UseSyslog = false
    File = /var/log/hhvm/error.log
    Access {
        * {
            File = /var/log/hhvm/access.log
            Format = %h %l %u %t "%r" %>s %b
        }
    }
}
MySQL {
    ReadOnly = false
    ConnectTimeout = 1000 # in ms
    ReadTimeout = 1000 # in ms
    SlowQueryThreshold = 1000 # in ms, log queries taking longer than this to slow_queries.log
}
3. 重新加载systemd守护进程并启动HHVM服务
sudo systemctl daemonreload
sudo systemctl start hhvm
sudo systemctl enable hhvm
配置Nginx与HHVM集成
为了使Nginx能够处理PHP请求,您需要配置Nginx以使用HHVM。
1. 编辑Nginx配置文件
打开Nginx的主配置文件,通常位于/etc/nginx/nginx.conf,并在其中包含HHVM的配置:
cd /etc/nginx
vi nginx.conf
在http块中添加以下内容:
include /etc/nginx/hhvm.conf;
然后创建一个新的配置文件hhvm.conf:
location ~ \.(hh|php)$ {
    root /usr/share/nginx/html;
    fastcgi_keep_conn on;
    fastcgi_pass unix:/var/run/hhvm/hhvm.sock;
    fastcgi_index index.php;
    include fastcgi_params;
    fastcgi_param SCRIPT_FILENAME $document_root$fastcgi_script_name;
}
保存并退出编辑器。
2. 重启Nginx服务
sudo systemctl restart nginx
通过以上步骤,您应该能够在CentOS 7上成功编译、安装并配置HHVM,并将其与Nginx集成,以便更高效地执行PHP代码,如果遇到任何问题,请检查错误日志并确保所有依赖项都已正确安装。